Showing posts with label weddings. Show all posts

Friday, May 6, 2011

Fill in the Blanks

Fill in the Blanks via ... all I'm gunna say is you are so lucky I am awake to do this! Right now I feel like someone is standing on my eyeballs and rolling them in dirt haha... loooooong day! But a nice wedding :)

1. What I love most about my home is the lake across the road and the guy I share it with.
2. I'm excited because it's Sabbath! I can chillax and not worry about all the assignments and general stuff of everyday life. Plus I got to see my best friend today :)
3. My preferred method for blowing off steam when I'm frustrated is yelling. and punching things ... I'm not sure.. I don't really think that I get frustrated that often...
4. Currently I am craving sleeeeeep and laying down, my shoulders, legs, back and eyes are killing me
5. The thing I love most about my mum is that there is no other like her. I can have the best chats with her and the best shopping trips (you know it's true mum ;) and often it feels like we're the same age, she's just smarter and knows more about life. It's awesome! I love youuuu mum!!
6. If I was going to write a book about my life, the title would be "Spazzmania" - i dunno why, it just would be.
7. If I were to eat one thing for the rest of eternity it would be food? duh!

And here is the photo I promised....


Now I am going to collapse into bed! Goodnight :)

Wedding day

Hello! Coming to you live from Maccas free wireless, on my way to shoot a wedding!
Yesterday I missed delightful dishes due to crazy procrastination interspersed with work...
So to make up for it, I promise I will share when I get home tonight with one image from the wedding and also a fill in the blanks.. No matter how tired, I promise!!

Tuesday, April 5, 2011

i used to be cool.

And here's some proof.


Most of these are photos from at least 1-2 years ago, if not more.. I wish I had nice lighting to take photos now.. but there is not any here.. boooooooooo

Also, tonight I went through some of my wedding photos and quickly edited a few.
We got a friend to take them and he gave them to us in RAW as we wanted to edit them ourselves.... this was almost 2 years ago now and I don't think I've seen them all yet... 

Here's one for you to look at :)

Tuesday, February 22, 2011

oh.

I'm feeling so uninspired!
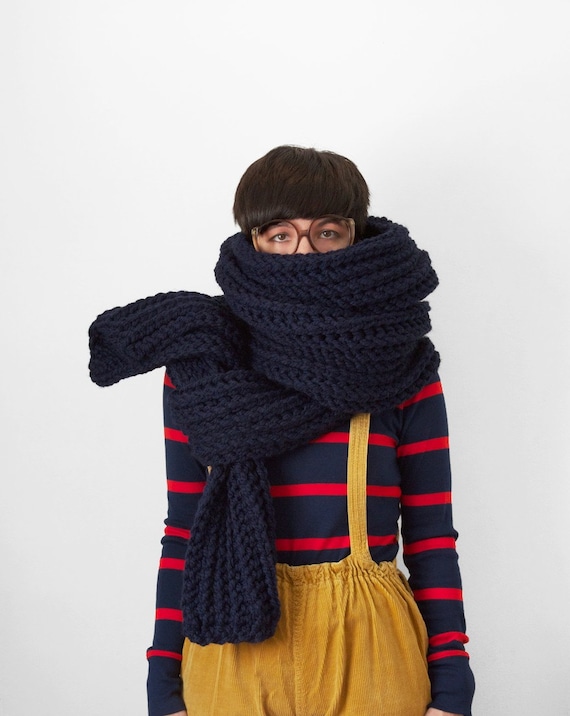
All I want is some chunky chunky wool + some knitting needles then I'd be right.


from yokoo

Gotta say I love her chunky chunky knitting skills & crazy photos .. super dooper cute!


Today I went for a job trial/job thing. Which went well + I'm happy!
I kept praying for some work + this is an answer to prayer. Also tomorrow I have another interview. Hoping it goes well.


I also just sent out some emails about my cards + did some heavy but targeted facebook liking/commenting which gained me 3 fans right away.. so that looks like the go. I'll have to hit that up regularly + then maybe some will actually buy my cards! {I wish I could sound more pro + popular + say that I have sold billions. .. But that would be stretching the truth.. just a little itty bit}

Hmm..
So not much to share.
I was thinking in my head on the way back from said job that I should start learning how to code online shops + make me one of those.  I hand code all the websites I design + definitely need to keep teaching myself new tricks.


Oh. And the other thing that I have to code is a brand spankin' new website for Flashbox.
Mainly just for the wedding photography side of it. To make it more appealing + capturing.
And more weddingy. And show off our photography skills a little better.
Fun!

Tuesday, January 25, 2011

Ring a ling a ling

Hello Master Blog.

Well in case you're thinking about putting a ring on Miss Blogs finger anytime soon I thought I'd give you some inspiration!

Here are some delightfully simple and fine little rings for you too look at! I almost wish I'd found these sites before Mr Peck & I found mine because we couldn't get any rings with were this fine in a normal jewelry store... We probably couldn't have afforded it anyway ;)


I found all these links through A Cup of Jo

My favourite is Satomi Kawakita's rings.. especially the second down with the little pearl.. so simple and beautiful!! 
What about you?

Monday, January 24, 2011

Photo Editing Tutorial Part 2

Hey-yipee-oh...

Welcome to Part 2 of Photo Editing Tutorial.
In this part we're gunna look at touching up and colour correcting.
If you missed Part 1 be sure to check it out!


One of the easiest ways to colour correct is to adjust the levels and curves of an image.
These are pretty much the only things I ever touch on an image (after adjustments in Camera Raw) and what I always include in my actions. 

Usually I use Auto on the levels but sometimes if it's obvious, I adjust the levels by hand.


As you can see above, the levels are shown as a histogram and the right side of this is pretty flat. When it looks like this I usually drag the marker (that triangle thing on the bottom of the histogram) over to where the 'mountain' starts.  This kind of bumps the whites in the image up. If it's flat on the left I'll drag that over the where the 'mountain' starts on that side also, bumping up the blacks. Do a bit of experimentation and you'll see what I mean.

With the Curves, you can do all sorts of interesting things with the colour channels.  This is where you can have some fun with colour correction. At the moment I'm enjoying some cross processing (which is a term left over from the old days of film processing where a film was processed in the wrong chemicals.


As you can see above, the coloured curves are crossing each other. Below is a before and after of what this kind of processing does to an image.


Again, just experiment! You can also find heaps of resources on deviantART and other sites... Google is your friend!


Ok, now comes the time to touch up images of people... When you're doing wedding photos and the client wants some that are going on the wall, you want them to look their very best.  Sometimes when you're sitting funny or your head is on a certain angle you get lumpy, bumpy or bulgy bits that aren't very flattering. This is where the Liquify Tool (found in Adobe Photoshop) becomes very very useful!

Here's an example- 


It's that easy... try it! But don't go too heavy & be careful.. it's very easy to make it look fake!
Blemishes and stray hairs are a thing of the past with this tool.
Check it out -


It looks just like the brush tool, but kind of clones and blends over the blemish so you get a smooth appearance that looks like the surrounding area. Too easy! You can use the clone tool as well, but once again be careful or you'll make the skin look like plastic! 

And that ends this short tutorial on photo editing. 
Hopefully these short tips have helping in some way!